I have been catching up on administrative things- so nothing much textile has been done since my last posting. I have been revamping some of my notes on printing. There are so many books on printing and many websites that give information, that sharing these notes is no great shakes- however please do note that these notes are my copyright instructions. I had wanted to include images, but it is so cold today that I can't go outside . Writing the notes however made me want to start printing again! I also recommend to you Laura Liebenberg's website which has a downloadable pdf document with various techniques with photos.I brought home some more of her textile paints this time as i really like the product and the colour selection is great. I have also appended a list of suppliers I have used in the past.
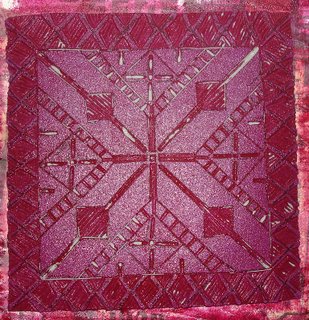
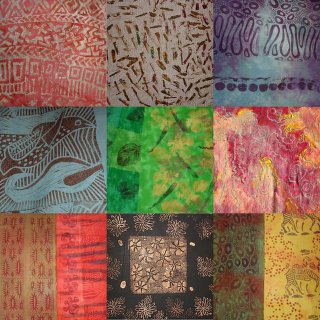
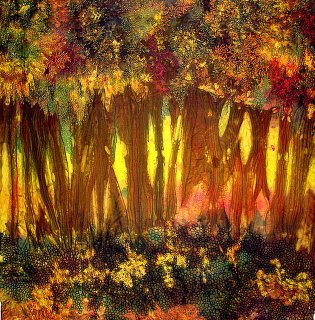
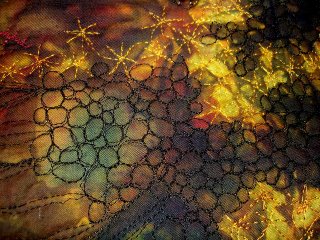
Hand printed fabric.
© Dijanne Cevaal 2006
I started had printing almost as soon as I started dyeing fabric, as often the commercial fabric of that time, did not have the patterning or imagery that I wanted. My workspace has always been confined so I had to find a way to print, which was easy to set up, pack up and that does not take up a lot of space. I therefore started with stencils, linocuts ad printing with found objects like leaves. Today there are many methods to apply imagery to fabric including your computer, but I have always stayed with simple techniques because they are not difficult to do, they are durable and have the touch of my hand. I use textile printing inks, which are readily available from art shops or specialist suppliers, a list of which is at the end of these notes. Types of textile printing ink include Permaset, although my preferred choice in Australia is Texcraft printing inks and in the Netherlands Trapsuutjies. However if you are stuck and cannot get textile printing ink it is possible to use acrylic paints that come in tubes called Chromacry1. I especially like using the metallic inks on dark fabric .Lino is readily available from art shops in order to make your own stamps as are the tools for cutting/carving the lino. If you cannot find lino you can also carve craft board. You also need to be aware that unless the textile inks are metallic or have an opaque base you cannot print on darker fabrics. You need to print on fabrics that are lighter in colour. The inks discussed are suitable for cottons and linens. If you want to print on polyester fabrics you can buy a polyester setting agent (which I get from KraftKolour)
Stencils are also easily made using the stencils plastic used for quilting stencils or architectural drafting paper, or screen printing plastic film. The stencils can be cut with a craft scalpel. Indian wood blocks are also great to print with and can be purchased from Third World shops.
Safety
Printing inks are made from pigments and chemical binders. Therefore you should be careful in handling printing inks and making sure they are stored safely. Use disposable gloves for you hands and if you are printing large amounts of fabric wear a face mask. The odour of some printing inks can be quite irritating for some people so always work in a well ventilated area. I often print outside on a sunny day.
Method
The method for printing is easy. On my work table a place a large newspaper and over the top of that I lay a piece of fleecy tracksuit material- - something that has a little bit of give. This will be your printing mat. Always iron the fabric to be printed as creases also print. Lay the ironed fabric onto the printing mat. (you can also use the protective sail that you can buy for a dining table)
Anything that has a relief surface can be used for printing- e.g. ivy leaves, wattle tree leaves, geranium leaves, herringbone ferns, bracken leaves, maple leaves, potato mashers, bubble wrap plastic, lino cuts stamps orange bags
You will also need a foam rubber roller- these are readily available from hardware stores. It is important that it is foam. Otherwise if using stamps or lino cuts a printing pad can be made- by placing some foam rubber onto a hard waterproof base. However I tend to use a roller that is about 3-4 inches wide. I wet the roller first and then squeeze it as dry as I can with my hands. I then put a good tablespoon of printing ink onto the plate (or foam meat tray that you get from the supermarket). I roll my foam roller through the ink ensuring that I get even ink coverage over the whole roller. I lay the object with which I intend to print on a sheet of newspaper next to my printing mat and roll the ink as evenly as I can over the surface of the object. You need to ensure that the ink coverage of the object is not too thick or too little (you will get the feel for the right amount after printing a number of times) I usually print my first print onto paper to make sure it prints properly.
You are now ready to print onto fabric. Roll some more ink onto the linocut or object and press it ink side down onto the paper. Press it evenly all over and trying to make sure you don’t move the object (this will blur the print). I use a brayer (a smooth rubber roller used in paper printing) to roll over the back of the object especially with lino cuts. If you are printing with foliage I place a piece of paper over the back of the foliage once it has been placed onto the fabric and press the newspaper covered foliage evenly.
Trouble Shooting;
- If the printed image is too blobby- you have too much printing ink on the surface of the object you are printing with. You may also have too much textile ink on your foam roller.
- If the image is too light or patchy you have not put enough printing ink onto the object you are printing with or you have not put enough textile ink onto your roller.
- If the image is streaky you have rolled the ink in a streaky manner- the streaks actually print. This is why I do not use a brush to apply the textile ink as the brushstrokes also print.
- If the image is blurry you may have printed too many prints with the object- the ink tends to build up on the object and can coagulate, especially if the weather is warm. So it is best to wash it and start afresh. It is also possible that you moved the object ever so slightly in the pressing down process.
Creating an Image onto Lino
Basically any image can be used to create an image on lino- however those with clear lines and delineated areas work best. I often use photos and place them on my scanner and blow up the image to the size I would like. I then reduce the image into gray scale so that I can clearly see areas of shadow and see the lines more clearly ( grey scale actually works better for this than reducing into black and white- you ca also use this process to create stencils). I then tape a piece of carbon paper face down onto the lino and place my grayscale image over the top and trace over the lines I want to show (I know carbon paper is from the antique days so you can also do this with a ballpoint pen and press hard so that the lines dent through onto the lino) Once the image is transferred you can then cut the lines. I am always looking to create texture with my linocuts. Lino cutting is actually working in reverse so that you have to think carefully about positive/negative imagery. What you cut away does not print- what you leave behind does.
Troubleshooting
- If the lino you are cutting is too hard- you can warm it by placing it in a low temperature oven for a few minutes. You may need to do this several times in the cutting process. Do not place the lino in a microwave!
- Always cut away from you. The cutting tools are very sharp and can create nasty gashes in your hands.
When the lino has been cut it can be mounted on a piece of wood like a stamp, however I dind with bigger lino cuts that the lino is easier to use unmounted as then I can roll the brayer all over the back of it for more even pressure.
The beauty of lino cuts is that they can be used again and again. You will need to wash your lino-cut when you have finished printing- this is easiest done with a brush and hot water and preferably in your laundry sink, as printing ink is a chemical and probably best not used to wash down your kitchen sink.
Heat setting and Permanency
When the fabric you have printed is touch dry you will need to iron it in order to heat fix it (If using Trapsuutjies printing ink you heat set in the oven). When ironing I usually place a piece of muslin over the printed fabric and iron for approximately 3 minutes on the appropriate heat setting for the fabric you are using. Your fabric I snow heat set.
After heat setting it is possible to wash your fabric- though for durability and best results hand wash or use the gentle cycle on your washing machine
Suppliers I have used in the past
Europe:
Galerie Smend; http://www.smend.de/shop/index.html
Dreamline: http://www.dreamline.nl/
Zijdelings: http://www.zijdelings.com/
Trapsuutjies;http://www.trapsuutjies.nl/
Australia
KraftKolour: http://www.kraftkolour.com.au/
The Thread studio; http://www.thethreadstudio.com/
Zartworks; http://www.zartart.com.au/html/zartworkscontact.html
New Zealand
Tilia Dyes; http://www.tillia.co.nz/
United Kingdom
Artvango; http://www.artvango.co.uk/
Kemtex ; http://www.kemtex.co.uk/kemtexreact.htm
Paula Burch has a comprehensive list of suppliers for other regions and for the USA on her website
http://www.pburch.net/ and more specifically here http://www.pburch.net/dyeing/dyesources.shtml

